Common Air Compressor Problems
- Air Compressor Won't Operate
- Leaking Air
- Excessive Noise
- Compressor Humming
- Oil Doesn't Last Long Enough
- Excessive Oil in the Air Compressor Discharge Air
- Constant Vibration
- Compressor Won't Build Pressure
- Not Enough Pressure
- Extreme Stress on Pully or Belts
- Receiver Pressure Takes Too Long to Build
- Air Comes Out Too Hot
- Compressor Gets Bogged Down
- Milky Oil in the Reservoir
The air compressor is a powerful machine that, in today’s high-tech world, is used by everyone from auto mechanics to furniture makers, in addition to manufacturers large and small. While compressed air is relied upon for heavy-duty tasks that would otherwise require tremendous manpower, a compressor will sometimes require regular maintenance to ensure proper operation.
However, any piece of equipment may fail from time to time, leaving you wondering, “What’s wrong with my air compressor?” Whether there’s a problem with the motor, lubricant supply or pressure, the issue needs to be remedied before it spirals into a costly repair. The following air compressor troubleshooting tips can help solve some of the most common problems that are known to occur with air compressors.
Air Compressor Won’t Operate
If a compressor fails to operate, it’s usually caused by a basic problem or simple oversight. Fortunately, operational issues are among the easiest problems to diagnose and remedy on air compressors. The most common problems can be remedied as follows:
- No power — If the compressor lacks electrical power, check the power button and activate the reset switch if needed. Breakers should also be checked.
- Lack of oil — Users sometimes forget to check or change the fluids, and the consequences are often grievous. If your compressor is failing to work properly, it could simply be from a nearly empty oil tank.
- Power switch failure — When the compressor fails to power on, it could be due to a lack of contact between the pressure switch and inner circuitry. This can possibly be remedied with adjustments to the pressure switch.
- Pressure disparity — If the tank pressure is too low in relation to the cut-in pressure, replace the pressure switch for one with reduced cut-in.
When you’re used to a machine working and one day it fails to power on, the experience can be quite shocking. In most cases, however, the failure could be simply caused by oversights like an unturned switch, a lack of fluid or an unplugged cord. With compressors, operation failure could stem from one of the other issues covered in this air compressor troubleshooting guide.
Compressor Leaks Air
If you shut down the compressor when the tank is filled with air and then find that the pressure gauge is showing a drop in pressure, you know that the compressor is leaking air. If you plug in the compressor, the pressure switch response to the air leak and dropping compressor pressure will be to start the compressor again. To try and find the leak, do the following.
- Listen for the leak —If the air leak is bad enough, you will be able to hear a hiss where the air is escaping.
- Feel for the leak — You may be able to feel the air leak with your fingers by running them along the hoses and other components.
If you cannot pinpoint the leak visually or by listening for it, try soaping the compressor’s connections. First, pull the hose away from the compressor coupler. Then, take a solution of dish soap and room temperature water and brush it onto each compressor and the coupler end. You will be able to identify a leak by bubbles forming at the point of leakage.
Excessive Noise From the Compressor
When a reciprocating type air compressor makes loud noises that seem obnoxious and out of character, it’s likely due to one of the following, easily corrected issues:
- Loose parts — Noise is often the result of loose internal parts. Check for looseness in the pulleys, cooler, flywheel, clamps, belt, accessories, etc. and perform tightening as needed.
- Troubled crankcase — Another common noise culprit is the defective or oil-deficient crankcase. Check to see whether the crankcase needs new oil or bearings, or if it needs to be replaced outright.
- Problem pistons — Noise also occurs when the piston hits the valve plate. Take out the cylinder head and check for dirt on the piston, then replace the gasket and reattach the head.
- Improper mounting — A further cause of noise is when the compressor is mounted loosely. Refasten the bolts on the compressor and check to see whether the vibration pads need to be installed or replaced.
If compressor noise gets out of hand, it can make the machine quite difficult to work around. In most cases, obnoxious sounds are an indicator that something is indeed wrong with the unit internally. While the problem might not indicate an immediate need for major repairs, it could lead to such if action isn’t taken now to stem the problem with simpler adjustments.
Compressor Only Hums
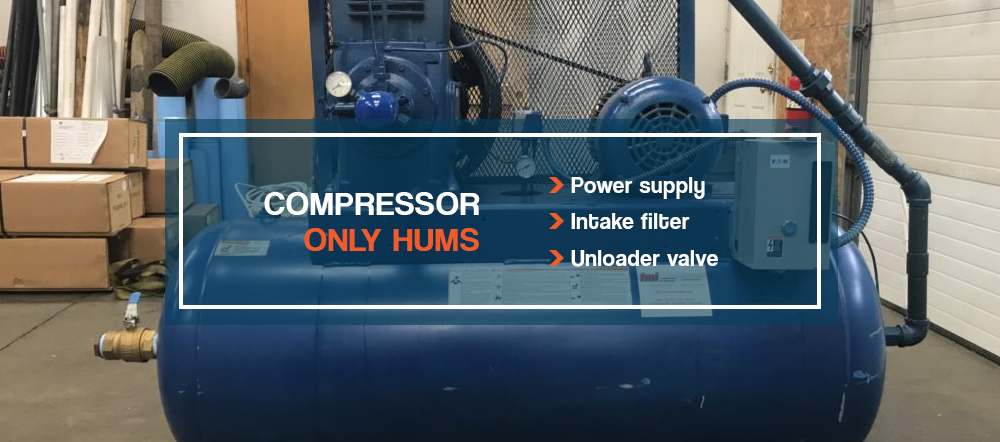
A compressor that only hums is in danger of rapid overheating and subsequent motor damage. To find the source of this issue, try inspecting the following.
- Power supply — Your power supply needs to be clean and take the shortest route possible. Using an extension cord or power bar can cause significant issues, so try plugging the cord into a wall socket with minimal other devices and see if the compression cycle starts.
- Intake filter — Remove the intake filter and start the air compressor again without it. If the compressor starts without the intake filter, replace the filter and see if that fixes the problem.
- Unloader valve — One of the potential valve issues is air becoming trapped above the pistons. The extra load can sometimes stall the motor.
Oil Doesn’t Last Long Enough
A compressor needs oil to run properly, pure and simple. That said, few aspects of compressor operation are more annoying than periods where the oil expires too quickly. If a compressor’s oil supply is in constant need of replacement, it’s likely down to one of the following four factors:
- Intake obstructions — A sign of neglect is when blockage forms at the air intake. If this happens, the filter needs urgent cleaning, and in some cases a replacement.
- Oil leaks — Leaks of oil can usually be stopped by tightening the bolts of relevant machine parts or by replacing the oil gasket.
- Worn piston rings — When piston rings appear visibly worn, the time to replace them is now, not later.
- Improper oil viscosity — If the oil viscosity is off, it’s time to drain and refill with a different oil and with the right viscosity.
Oil can also be lost if the compressor constantly tilts, but this can be fixed by placing the compressor on a different surface with the addition of vibration pads. Furthermore, if you find the cylinder is scored, it needs to be replaced.
Excessive Oil in Compressor Discharge Air
When excess amounts of oil become aerosolized by the compressor’s discharge, it can be damaging to pneumatic tools and accessories. Even worse, oily discharge poses ill effects on applications, sometimes to the point where projects must be scrapped and reworked entirely. Luckily, the problem is usually easy to identify and remedy, since oily discharge is typically down to one of the following issues:
- Restricted intake — Oily discharge is often caused by restrictions on the compressor’s air intake. In cases such as these, the air filters either need to be cleaned or replaced altogether.
- Expired piston rings — Just as with oil leaks, oily discharge can stem from worn piston rings, which need to be replaced on a periodic basis.
- Overfilled oil tank — If the compressor has too much oil, some of that excess can seep into the discharge. The oil level needs to be lowered to the “full” mark displayed on the gauge.
- Wrong oil viscosity — If the viscosity doesn’t match the requirements of your compressor, empty the oil tank and refill with a different oil of the proper viscosity.
- Inverted piston rings — A further possible cause of oily discharge is upside-down piston rings, which could mean that it’s time to replace the crankshaft.
If you use compressed air for the purpose of spray painting, sanding or the application of finishes, proper air treatment is essential as you cannot allow aerosolized oil to enter the airstream. With preventative maintenance, you’ll greatly reduce the risk of having projects ruined by the interference of oil particulates in paint jobs and finishes.
Constant Vibration of the Compressor
Vibrations from any piece of machinery can be troublesome. In the case of an air compressor, vibration could be the result of looseness in any number of areas. The following parts should be inspected for looseness or alignment problems and tightened or adjusted accordingly if tremors/vibrations persist.
- Mounting bolts — If the bolts are loose, they need tightening.
- Crankshaft — If bent, it’s time for a new crankshaft.
- Belts — If loose, the belts need tightening. Inspect for wear and tear. It could be time for replacement.
- Pulley and flywheel — If either is misaligned, this must be repaired immediately.
Vibrations could also persist if the compressor isn’t mounted correctly, in which case you’d need to check the underside to make sure all four legs of the unit are firmly flat on the ground. Even with all the aforementioned parts tightened, tremors/vibrations could still be an issue unless all legs are sufficiently touching the floor.
Compressor Will Not Build Pressure
In some cases, a compressor will run as though it is functioning properly when, in reality, there is a problem with compressor pressure. There may be some buildup of air in the compressor, or it may not have any air at all. Alternatively, the pressure might plateau at a particular psi and fail to build further than that. The possible sources of this issue could be:
- Intake valve failure
- Pressure valve failure
- Gasket failure
- Piston seal failure
- Compromised tank check valve
Inspecting these components and replacing ones that are worn or damaged usually solves this problem.
Inadequate Pressure at the Tool Tip
If there’s not enough pressure at the point of use, the problem is likely due to air restrictions, leaks or problems with the hose or compressor belts. The following issues are common and easy to remedy:
- Pressure blocks/leaks — Air can either get cut off or leak out at certain points along the way between the compressor and the tool. Inspect the hose or pipes for crimps or holes, then repair these problem areas by straightening the kinks or plugging the holes as needed.
- Air intake restrictions — If air is getting blocked from the intake valve, the filter is likely due for a cleaning, if not an outright replacement.
- Loose belts — When belts come loose, a retightening will usually fix the problem unless they’re too old, in which case they probably need to be replaced altogether.
- Undersized hose — You might discover that the hose is too narrow to supply the right air pressure, which would mean it’s time to upsize.
There could also be a problem with pressure at the point of use if the requirements of a tool exceed the capacity of the compressor. Before buying a new tool, check to see whether its cfm and psi requirements are within the range that your compressor can handle. Likewise, when buying a new compressor, make sure it has the capacity for every tool in your arsenal.
Extreme Stress on the Belts
When worn down excessively, there’s either a problem with the pulley or with the belts. Therefore, the solutions are relatively simple:
- Misaligned pulley — Trouble with the belts is just as likely due to the pulley as the actual belts. In cases like these, the problem can easily be solved by readjusting the motor pulley.
- Excessively tight or loose belts — Then again, it’s often just a matter of poor belt tension, in which case the belt(s) could be due for readjustment.
If the pulley or flywheel is unstable, inspect the crankshaft for any bend or signs of wear. Sometimes the problem could even be down to a nick or bump in the pulley groove, in which case the groove needs to be filed smooth.
Sluggish Buildup of Receiver Pressure
When the receiver pressure takes too long to build, the issue is most likely due to dirt accumulation or wear in any given one of the following compressor parts:
- Filthy air filter — One of the most common culprits when it comes to lagging receiver pressure is dirt buildup on the air filter, which could either need to be cleaned or replaced.
- Loose joints — Low pressure caused by air leaks can stem from joints that aren’t tight enough. Check to see if the joints need tightening.
- Loosened belts — The belts might need to be tightened or replaced.
- Worn head gasket — The cylinder head gasket could possibly be expired, in which case replacement is crucial.
- Expired valves — If the intake or discharge valve plates are torn or worn, replace them with new ones.
Alternately, slow receiver buildup could be down to insufficient compressor speed for the applications in question. When starting a first-time application, check to see if your compressor is capable of meeting the challenges at hand.
If you’re dealing with a reverse problem where the receiver pressure grows too rapidly, it’s likely caused by excess amounts of water in the receiver, which should be drained on a regular basis.
Extreme Air Heat at Discharge
If the compressed air comes out too hot, it can damage the items and surfaces being treated, as well as the tools and various internal mechanisms of the compressor. Excessive air heat often stems from the following problems:
- Dirty internal surfaces — Check to see whether dirt has built up on the cylinder, discharge tube or intercooler and clean as needed.
- Meager ventilation — If the compressor is set up in a hot or poorly ventilated area, move it someplace else where ambient air is cooler and flows more freely.
- Expired head gasket — When the head gasket blows, heat is inevitable. Therefore, it could be time to replace the head gasket.
- Run down valves — Hot compressed air is also an indicator that it’s time to replace the valve plate.
- Limited air intake — Compressed air can overheat when dust and lint accumulate on the filter. If overheating reoccurs despite the above replacements, the filter probably needs to be cleaned at more frequent intervals.
Overly hot compressed air can be damaging in applications where the air itself is being applied to a given surface, such as when compressed air is used for the purpose of drying, cleaning and dusting. Thankfully, the problem is easy to remedy with inspections and maintenance of the valves, gasket, filter and internal surfaces.
Compressor Gets Bogged Down
When your compressor shows a tendency to work well for short durations but quickly and prematurely run out of steam, it’s often due to problems with the motor. Look for the following issues if constant bog-downs apply to your machine:
- Divided power supply — The power supply to a compressor can also be diluted by the use of a power bar. Instead of splitting the resources of an A/C outlet between a compressor and other machines, give your compressor the full, undivided power of one outlet.
- Overdrawn power circuit — An air compressor needs the undivided power of a 15-20 amp breaker at minimum. If other machines are also being powered on this same circuit, turn them off so the compressor can receive the full power source.
- Unloader valve failure — Power lags also result from failed unloader valves. This problem can be diagnosed by manually enacting the valve function. Open the tank and drain out the air and water, then close and power back up. If the compressor bogs down once again, the valve needs to be replaced.
Compressed air applications rely on a steady supply of pressure at the point of use. If your compressor fails to deliver the needed power despite running from a sufficient and undivided power source, the problem could simply be that your compressor lacks the capacity to handle the tools and applications in question.
Milky Oil in the Reservoir
When compressor oil takes on a milky color, water has made its way into the reservoir via condensation. This would indicate that operating conditions have been too hot for the compressor. For an instant remedy, you have two options:
- Colder air — Move the pipe air intake to an area where the ambient air is of a lower temperature.
- Daily drainage — Regardless of whether condensation occurs slowly or rapidly inside the compressor, the tank should be drained after each day’s usage.
Oil is the lifeblood of any piece of machinery. As such, instances of off-color oil inside your compressor should be a major concern. After all, if the oil fails to do its job properly, internal moving parts could cause friction and corrode, which could ultimately lead to costly maintenance or a shorter life for the compressor. Therefore, if oil problems get out of hand, have your compressor serviced by trained professionals.
In any case, the quality of oil can be better maintained with frequent oil changes. Be sure to consult your owner’s manual for the recommended frequency for oil changes.
Quincy Compressor: The World’s Leading Supplier of Air Compressors
When properly maintained, a high-quality air compressor can provide super performance on a vast range of applications for many years of use. Throughout the industries that use compressed air for operations, Quincy Compressor is among the most trusted providers of compressors and air tools.
For nearly 100 years, we’ve led the way in developing compressors that serve in industries like auto assembly, building construction and furniture making. To learn more about our vast offering of air compressors and accessories, visit our sales and service locator page today.


